

Windsor Tie Knot
Windsor, Full-Windsor, and Double Windsor all refer to the same type of necktie knot. It is a classic and impressive tie knot, perfect for formal occasions like weddings, interviews, or important meetings.
While it requires a few more steps than simpler knots, the effort pays off in a sophisticated and polished look. Here’s how to tie a Windsor tie knot:
- Four-in-Hand knot
- Half-Windsor Tie knot
- Windsor Tie Knot
- Shelby Tie Knot (Pratt knot)
- The Simple (Oriental) Necktie Knot
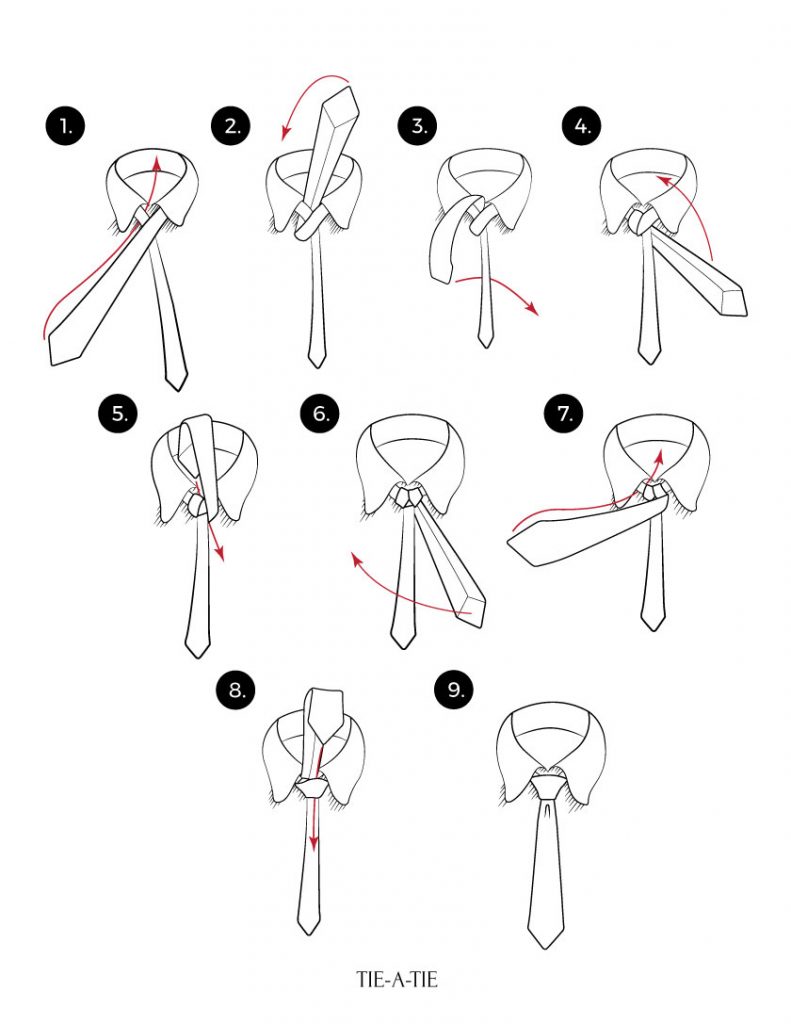
0. Start with the wide end of the tie in your right hand and the narrow end in your left. Ensure the wide end is about twice the length of the narrow one.
1. Cross the wide end over the narrow end, making an “X” with the ties.
2. Bring the wide end under the narrow end, from right to left.
3. Pull the wide end up through the loop you created, but this time, loop it around the back of the narrow end first.
4. Bring the wide end down in front of the narrow end, then wrap it under the loop around your neck.
5. Pull the wide end up through the loop between the collar and your tie.
6. Tuck the wide end down behind the front of the tie, making sure it goes through the loop around your neck.
7. Tighten the knot by gently pulling the narrow end of the tie. Adjust the knot so it sits evenly against your collar.
Tips:
- Use a tie made from a smooth fabric like silk or satin for easier knotting and adjusting.
- Ensure your collar is the right size. A tight collar will make tying difficult, while a loose collar will make the knot look sloppy.
- Practice tying the knot in front of a mirror until you get the hang of it.
Remember, mastering the Full Windsor takes practice, but with patience and persistence, you’ll be tying this impressive knot in no time!