
Introduction:
This is Method 5 in our troubleshooting guide for Samsung Side-by-Side refrigerator ice maker issues. If your ice maker seems to complete its freezing cycle (you might see solid ice in the mold) but fails to eject the cubes, or if ejected cubes are very wet and tend to clump together, a malfunctioning ice mold heater could be the problem.
The ice mold heater is a small heating element integrated into the ice maker’s mold. Its purpose is to briefly warm the surface of the mold just before the ejector arms sweep, slightly melting the ice where it contacts the mold. This allows the ice cubes to release easily. If this heater fails, the ice remains firmly frozen to the mold, and the ejector arms cannot push it out, or can only do so with great difficulty, often breaking the ice.
Disclaimer: This guide is for informational purposes. Checking the mold heater often involves observing the ice maker during its cycle while it is powered on, and direct testing requires electrical knowledge and specialized tools. Exercise extreme caution and keep fingers clear of moving parts when observing a powered cycle. For direct electrical testing or replacement, always unplug your refrigerator from the power outlet and turn off the water supply. If you are uncomfortable with these steps, please consult a qualified appliance repair technician. We are not liable for any damage or injury.
When to Suspect a Faulty Ice Mold Heater:
- The ice maker forms solid ice cubes in the mold, but they are not ejected, or only a few are partially ejected or broken.
- The ejector arms attempt to move but seem to struggle or jam against unreleased ice.
- Suppose ice is eventually ejected (perhaps after multiple attempts by the mechanism). In that case, it’s very wet, indicating it may have partially melted due to prolonged contact with a struggling heater or other means, rather than a quick, clean release.
- The ice maker seems “stuck” with a whole tray of ice that it cannot harvest.
How the Ice Mold Heater Works:
- After water in the mold has frozen solid, and just before the ejector arms begin their sweep, the ice maker’s control (either internal or via the main fridge board) energizes the mold heater for a short period (seconds).
- This slight warming is just enough to create a thin film of water between the ice and the mold surface, breaking the bond and allowing the ejector mechanism to push the cubes out easily.
Tools & Materials You’ll Need:
- Flashlight.
- Your Refrigerator’s User Manual (for initiating a test cycle, if possible).
- Multimeter (For advanced users/technicians to test heater continuity).
- Patience (Observing a complete natural cycle can take time).
Step-by-Step Guide to Checking Ice Mold Heater Functionality:
Step 1: Preparation and Safety
- Ensure the ice maker is turned ON at the control panel.
- The freezer should be at its normal operating temperature.
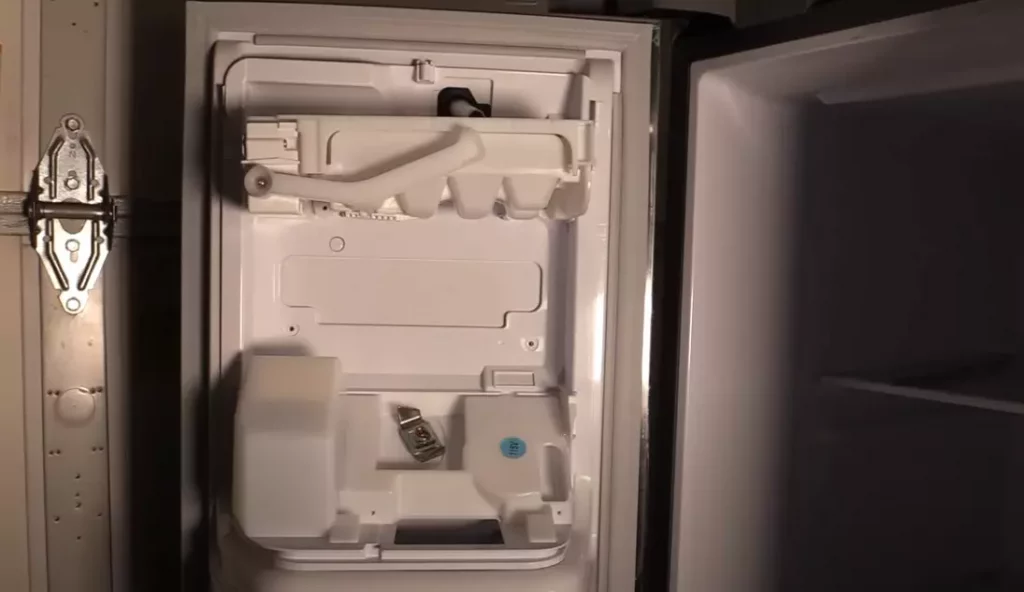
- Remove the ice bucket to get a clear view of the ice maker assembly and mold.
- For observation, power will be ON. For any direct contact or disassembly, power must be OFF.
Step 2: Observe a Harvest Cycle (Best way for most users to infer functionality)
This is the most practical way for a DIYer to check without direct electrical testing.
- Option A: Initiate a Test Cycle (Refer to Method 4):
- Locate and press the ice maker’s test button/switch as described in our “Method 4: Testing & Resetting the Ice Maker Cycle” guide.
- This will force the ice maker through its harvest sequence.
- Option B: Wait for a Natural Harvest Cycle:
- If you know the ice mold is full of frozen water (e.g., from a previous fill that didn’t eject), you can wait for the ice maker to attempt its next scheduled harvest cycle. This can take an hour or more, depending on when the last cycle finished.
- What to Watch For During the Harvest Attempt:
- Just before the ejector arms begin to move, the mold heater should activate. You will not see it glow, but if it’s working, the ice cubes should loosen slightly.
- Observe the ejector arms. Do they sweep through and eject the ice smoothly and cleanly?
- Or, do the ejector arms struggle, jam, make loud clicking/grinding noises, and fail to eject the ice, or only eject broken pieces?
Step 3: Interpret the Observation
- If Ice Ejects Smoothly, the mold heater is likely working correctly. The problem with “no ice” (if that was the initial symptom before seeing a complete mold) lies elsewhere (e.g., fill issue, ice level sensor).
- If ice does not eject or Ejects with great difficulty and breakage, this strongly suggests that the mold heater is not working or is very weak. The ice is remaining frozen solid in the mold.
- Touch Test (EXTREME CAUTION – Immediately After a Harvest Attempt & ONLY if you can do so SAFELY without touching moving parts or live terminals – generally NOT recommended for novices):
- If you have just observed a failed harvest attempt, and if you can safely and quickly touch the underside or sides of the metal ice mold (where the heater is embedded) immediately after the ejector arms have tried and failed, it might feel slightly warm if the heater activated at all. If it’s stone cold, that’s another indicator of failure. This is a risky and usually unnecessary approach; visual observation of the ejection process is safer.
Step 4: Advanced Check – Continuity Test with a Multimeter (For Experienced Users/Technicians)
- SAFETY FIRST: UNPLUG THE REFRIGERATOR!
- You would need to disconnect the wiring harness leading to the ice maker assembly.
- Identify the two wires that lead to the mold heater element (this requires a wiring diagram for your specific ice maker, usually found in the service manual).
- Set your multimeter to the resistance (Ohms Ω) setting.
- Touch the multimeter probes to the corresponding terminals for the mold heater.
- Expected Reading: A working heater should show a specific resistance value (e.g., typically between 40-120 Ohms, but this varies significantly by model).
- Bad Reading: An “OL” (Open Line/Over Limit) or infinite resistance reading indicates a broken heater element. A zero-ohms reading indicates a short.
Step 5: Addressing a Faulty Mold Heater
- Suppose the mold heater is diagnosed as faulty (either through failed ejection observation or a bad multimeter reading). In that case, the most common and practical solution is to replace the entire ice maker assembly.
- The mold heater is an integral part of the ice maker mold and is generally not sold or replaced as a separate component.
- Refer to “Method 10: Replacing the Entire Ice Maker Assembly” (from our French Door series, adapting for your Side-by-Side model’s specific assembly) for guidance on replacement. Ensure you order the correct assembly for your Side-by-Side model.
Important Considerations:
- Safety during Observation: Never put your fingers near the moving ejector arms or other mechanical parts when the ice maker is powered and cycling.
- Other Causes of Ejection Failure: While a faulty mold heater is standard, ensure the ejector motor itself isn’t seized or that there isn’t a severe mechanical jam unrelated to the ice being stuck (though less likely if ice is visibly frozen hard in the mold).
Conclusion:
A non-functional ice mold heater will prevent the ice maker from successfully harvesting ice cubes, leading to a complete mold of stuck ice and no new ice production. Observing the harvest cycle is the primary method for most users to diagnose this issue. If faulty, replacement of the entire ice maker assembly is usually required to resolve the issue.
Next in our series, we’ll discuss Fix Method 6: Optimizing Freezer Environment and Ice Level Management, which covers factors that can indirectly affect ice production and prevent jams.