
Introduction:
Method 6 in our series addresses the frustrating issue of ice makers freezing in Samsung French-door refrigerators. If your DIY sealing efforts (Method 1) haven’t fully resolved the problem, or if you prefer an engineered solution, Samsung sometimes releases official service kits, revised gaskets, or updated housing components designed to create a better seal around the ice maker compartment.
These official parts aim to correct specific design weaknesses that allow warm, moist air from the refrigerator to infiltrate the colder ice maker area, leading to condensation and subsequent freezing. This article will discuss these solutions and guide their installation.
Disclaimer: This guide is for informational purposes. Replacing physical components, such as gaskets or housing parts, can vary in complexity. Always unplug your refrigerator from the power outlet before attempting any disassembly or repair. If you are uncomfortable with these steps or if the specific kit for your model involves intricate assembly, please consult a qualified appliance repair technician. Always follow the instructions provided with an official Samsung kit or part meticulously. We are not liable for any damage or injury.

When to Consider Official Sealing Kits or Revised Parts:
- DIY sealing attempts (as detailed in Method 1) have not fully resolved the air leak and freezing issue.
- You’ve learned through Samsung support or online resources that an official sealing kit or revised part (e.g., a new ice room cover with an improved gasket) is available for your specific refrigerator model to address known sealing deficiencies.
- The existing gaskets or seals around your ice maker compartment are visibly damaged, torn, or misshapen.
- You prefer using official, pre-engineered parts rather than applying DIY sealants.
What are Official Sealing Kits or Revised Parts?
These can include:
- Revised Gaskets/Seals:
- Samsung might offer improved gaskets made from different materials, with a better sealing profile, or stronger adhesive to create a tighter, more durable seal around the ice maker housing or its access door/cover.
- Updated Housing Components:
- Sometimes, the plastic housing or cover of the ice maker compartment might be redesigned for a better fit and seal. Replacing an older version with an updated one can resolve inherent leak paths.
- Comprehensive Sealing Kits:
- Some kits may include a combination of new gaskets, insulating strips (similar to those used in DIY projects but perhaps pre-cut or made of specific materials), and potentially even small, revised plastic pieces to improve overall compartment integrity.
These are solutions engineered by Samsung to address specific points of failure in the original design’s sealing.
Obtaining Official Sealing Kits or Revised Parts:
- Contact Samsung Support: This is often the best first step. Provide your refrigerator’s model and serial number, and describe the persistent ice maker freezing and suspected air leak. They can inform you if specific kits or revised parts are available and provide instructions on how to obtain them.
- Get from Amazon: Samsung fridge Official Sealing Kits.
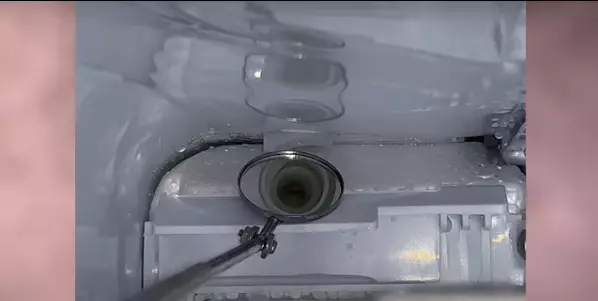
Different models may have different kits, so it is not possible to match them individually. However, we can refer to them as a maintenance idea. The following is a video we can refer to.
General Installation Steps (Always Prioritize Kit-Specific Instructions!):
Step 1: SAFETY FIRST – UNPLUG THE REFRIGERATOR!
- Disconnect your refrigerator from the electrical outlet.
Step 2: Thoroughly Defrost and Dry the Ice Maker Area
- As detailed in Method 3, thoroughly defrost the ice maker and its compartment. The area must be ice-free and bone-dry for new gaskets or components to be installed and sealed correctly.
Step 3: Disassemble Access to the Ice Maker Compartment Seals/Housing
- This will likely involve:
- Removing the ice bucket.
- Potentially remove the ice maker assembly.
- Remove any existing covers or housing parts that the new kit/part will replace.
- Carefully remove old, damaged gaskets if you are replacing only those.
Step 4: Clean Surfaces Meticulously
- If installing new gaskets, thoroughly clean the surfaces where the gasket will adhere. Remove all old adhesive, debris, and moisture. Isopropyl alcohol can be helpful for a final clean. The surface must be immaculate and dry for proper adhesion of new gaskets.
Step 5: Install the Official Kit or Revised Part(s)
- CRITICALLY IMPORTANT: Follow the installation instructions with your official Samsung kit or revised part. These instructions are tailored to that particular solution.
- If installing a new gasket: Carefully align and press the new gasket into place, ensuring it’s fully seated and making good contact all around. If it’s self-adhesive, provide a strong bond.
- If installing a revised housing component (e.g., a new ice room cover), carefully align the new part and secure it using the original screws or any new hardware provided. Ensure all clips engage properly and no new gaps are created.
Step 6: Reassemble Other Components
- Reinstall the ice maker assembly (if removed) and any other parts you disassembled, in reverse order.
- Install the ice bucket.
Step 7: Power Up and Monitor
- Plug the refrigerator back into the power outlet.
- Turn the ice maker function ON.
- Allow several hours for the refrigerator to stabilize and the ice maker to cool down and begin producing ice.
- Monitor the ice maker compartment closely for any signs of recurring frost or ice buildup over the following days and weeks.
Important Considerations:
- Correct Part Number is Essential: Ensure you have the exact kit or revised part specified for your refrigerator model.
- Follow Samsung’s Instructions: These parts are designed to fit and function in a specific way.
- May Not Be a DIY Task for Everyone: Some component replacements can be more complex than applying sealant. If in doubt, consult a professional.
- Not a Universal Fix: This method only addresses freezing caused by failures in the original physical seals or housing design that these official parts are intended to correct.
Conclusion:
Utilizing official Samsung sealing kits or revised gaskets and housing components can provide a more engineered and potentially more durable solution to air leaks around the ice maker compartment than general DIY methods. This approach is particularly relevant when a known design flaw for your model has an official fix available.