
Introduction:
Welcome to our series on fixing a common and frustrating issue with Samsung French Door refrigerators: the ice maker freezing up. If your ice maker (often found in models like the RF28HFEDBSR series) is constantly jamming, over-frosting, or failing to produce ice, a poor seal around its compartment is a likely culprit. This allows warm, moist air from the fridge to enter the colder ice maker area, leading to excessive ice buildup.
This article, Method 1, focuses on the most common and often effective DIY solution: sealing the ice maker compartment. To provide a comprehensive walkthrough, we will reference the steps shown in the Parts Dr. repair video (which you can view alongside this guide). Subsequent articles in this series will cover other methods.
Disclaimer: This guide is for informational purposes only. Working on appliances involves electrical components and potential risks. If you are uncomfortable or confident performing these steps, please consult a qualified appliance repair technician. Always unplug your refrigerator from the power outlet before starting any disassembly or repair. We are not liable for any damage or injury resulting from attempting these repairs.
Tools & Materials You’ll Need (as seen or implied in the video):
- Food-Grade RTV Silicone Sealant: Food Grade 100% Silicone Sealant by Sil-Bond (RTV 4500). This product is the top professional-grade choice for repairing refrigerators, especially for fixing icing issues in Samsung ice makers. It comes highly recommended by many appliance repair technicians and DIY users.
- Phillips Head Screwdriver.
- Small Flathead Screwdriver (or plastic pry tool): For prying.
- Flashlight.
- Paper Towels & Clean Cloths.
- Applicator Tip for Sealant Tube (if not integrated).
- Tool to cut the sealant tube tip (e.g., utility knife, pliers with cutters).
- Disposable Gloves (Recommended for applying sealant).
Step-by-Step Guide (Aligning with the Video):
Step 1: Initial Defrost (Forced Defrost Mode – Video 0:18)
- Before disassembly, it’s helpful to initiate a forced defrost to start thawing any ice.
- Enter Forced Defrost: On many Samsung models, press and hold the Energy Saver + Fridge buttons simultaneously for about 8 seconds until the display goes blank and beeps. Then, press the Fridge button (or cycle through options) until “Fd” (Force Defrost) appears on the display. (Some models might use Freezer + Lighting buttons.)
- Let the fridge run in this mode for 5-10 minutes. This will primarily defrost the primary evaporator coils, but can help with the ice room.
- Exit Forced Defrost: Press and hold the same initial buttons (e.g., Energy Saver + Fridge) until the display goes blank and beeps, returning to regular operation.
see samsung rf28hmedbsr forced defrost
Step 2: SAFETY FIRST – Unplug the Refrigerator (Video 0:58)
- This is the most critical safety step. Unplug your refrigerator from the wall power outlet.
Step 3: Access and Further Defrost the Ice Maker Compartment (Video 1:02)
- Open the refrigerator doors.
- To remove the Ice Bucket, grab the bottom of the bucket, lift it, and pull it out. (Some older models might have a release button.)
- Manually Defrost (If Necessary): The video notes that if there’s excess ice in the ice maker compartment, you should allow it to thaw naturally by leaving the refrigerator doors open.
- IMPORTANT (Video 1:17): The video explicitly advises against using external heat sources like a blow dryer or heat gun, which can warp the refrigerator’s plastic liner, causing irreparable damage.
- Ensure the compartment is completely dry before proceeding.
Step 4: Disassemble the Ice Maker Area (Video 1:30 – 3:12)
* Remove Wire Housing Cover (Video 1:31): Unscrew the Phillips head screw and pull the cover towards you to remove it.
* Disconnect Ice Maker Wiring (Video 1:40): Pull the wiring from the side channel. Depress the locking clip on the ice maker’s main wiring harness and unplug it.
* Remove Ice Duct Tray (Video 1:48): Unscrew the Phillips-head screw holding the ice duct tray. Then, using a small flathead screwdriver, gently pry the ice duct tray to the right and pull it down to remove it.
* Remove Ice Maker Unit (Video 2:00 & 2:29):
* Caution (Video 2:04): The ice maker has a built-in cooling coil on its underside. Be extremely careful not to damage or puncture this coil during removal, as damaging it can ruin the entire refrigerator. Ensure it’s fully thawed.
* Depress the top locking clip of the ice maker assembly. Pull the ice maker forward slightly, then down and out to remove it, being mindful of the cooling coil.
* Disconnect Auger Motor Wiring (Video 2:41): Depress the locking clip and unplug the auger motor wiring harness.
* Remove Auger Motor Assembly (Video 2:50): Using a flathead screwdriver, pry up on the bottom locking clip of the auger motor assembly. Then, carefully pull the assembly forward with your fingers, ensuring the wires on the left side are tucked in and don’t snag. You may need to gently push on the compartment’s sides as it comes out.
Step 5: Inspect for Gaps (Video 3:12)
- With the ice maker components removed, use your flashlight to inspect the inside of the now-empty ice maker compartment thoroughly.
- Shine the light along the left and rear edges/seams where the ice maker compartment housing meets the main refrigerator liner.
- Look for any visible gaps or bright areas where air could pass through. The video highlights these as problem areas.
Step 6: Clean & Prepare Surfaces for Sealing
- Ensure the refrigerator has come to room temperature and the ice maker compartment is completely dry (Video 3:49).
- Clean the identified seams/gaps with isopropyl alcohol and a clean cloth to remove any dirt, grease, or old sealant residue. Allow it to dry completely.
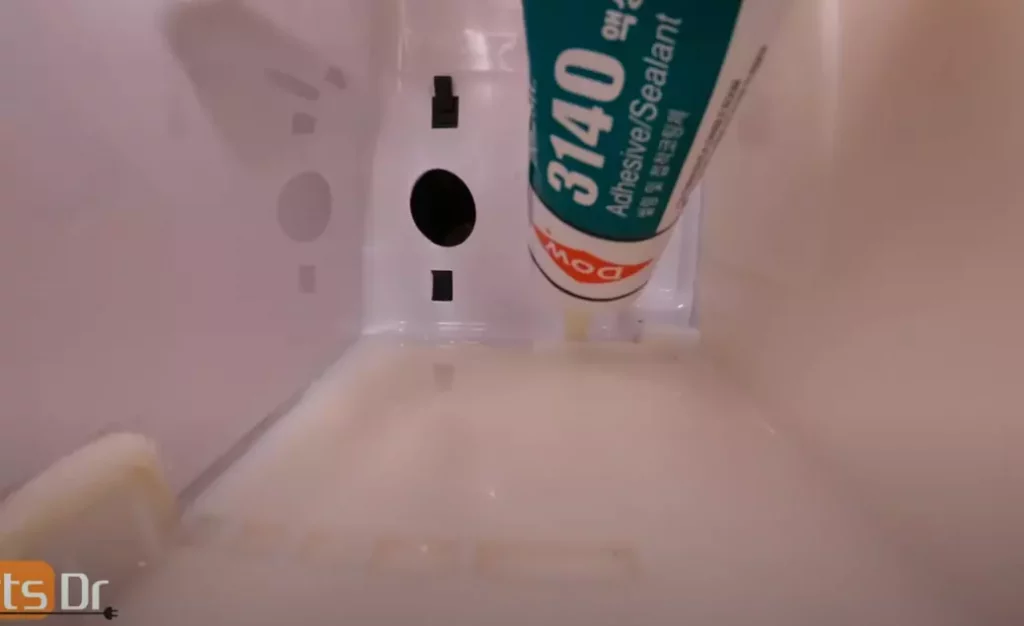
Step 7: Apply Silicone Sealant (Video 3:40 & 3:56)
- Prepare your sealant: Cut the applicator tip at a 45-degree angle (Video 3:40). Remove the tube cap and install the applicator tip.
- Carefully apply a continuous bead of the food-grade silicone sealant along the left and rear seams inside the ice maker compartment, filling any gaps you identified (Video 3:56).
- Smooth the bead with a gloved finger or a caulking tool for a good seal.
Step 8: Allow Sealant to Cure (Video 4:03)
- Crucial Step: Let the sealant dry and cure completely for at least 24 hours before reassembling or turning the refrigerator back on. Do not disturb the area during this time.
Step 9: Reassemble Components (Video 4:10 – 5:28)
* Install the Agger Motor Assembly (Video 4:10): Carefully slide it back in, ensuring the plastic edges don’t catch, and push until the bottom locking tab snaps into place.
* Reconnect Auger Motor Wiring (Video 4:25): Plug it back in and tuck the wires into the side channel.
* Install Ice Maker Unit (Video 4:32):
* Ensure the six small rubber pieces on the ice duct tray (still part of the ice maker unit) are in place.
* Align the two slots on top of the ice maker with the two tabs at the top of the compartment.
* Ensure the ice duct tray on the bottom of the ice maker is lowered.
* Carefully guide the cooling loop through the rear of the ice maker.
* Push the ice maker towards the rear until the top locking tab snaps into place.
* Install Ice Duct Tray (Video 4:58): Push the ice duct tray (removed in Step 4c) until it snaps into place. Reinstall the Phillips screw.
* Reconnect Ice Maker Wiring (Video 5:07): Plug the main ice maker wiring harness back in and tuck the wires into the side channel.
* Install Wire Housing Cover (Video 5:15): Push it onto the side and slide it towards the rear. Reinstall the Phillips screw.
* Install Ice Bucket (Video 5:25): Push it in until it locks into place.
Step 10: Power Up and Monitor (Video 5:29)
- Plug the refrigerator back into the power outlet.
- Turn the ice maker function ON via the control panel.
- Allow the refrigerator 6 to 12 hours to cool back down and begin making ice.
- Monitor for any recurrence of excessive frosting or freezing over the next few days.
Conclusion:
As demonstrated in the Parts Dr. video, this sealing method is a highly effective way to address a common design flaw in many Samsung French Door refrigerators. By preventing moist air infiltration, you should see a significant improvement in your ice maker’s performance.
Stay tuned for more articles in this series covering other potential Samsung ice maker issues fixes!