
I searched the Internet for a replacement for the Samsung refrigerator RF260BEAESR water filter. None are specific to this model. Although some videos apply to this model, certain precautions are not fully mentioned, so I decided to rewrite one based on the user manual.
Additionally, I have attached videos from other sources, which are both intuitive and comprehensive, to help solve the problem of replacing the water filter for this model.
To replace the water filter on your Samsung RF260BEAESR refrigerator, locate the filter inside the refrigerator, typically positioned between the crisper drawers. See Samsung RF260BEAESR water filter location.
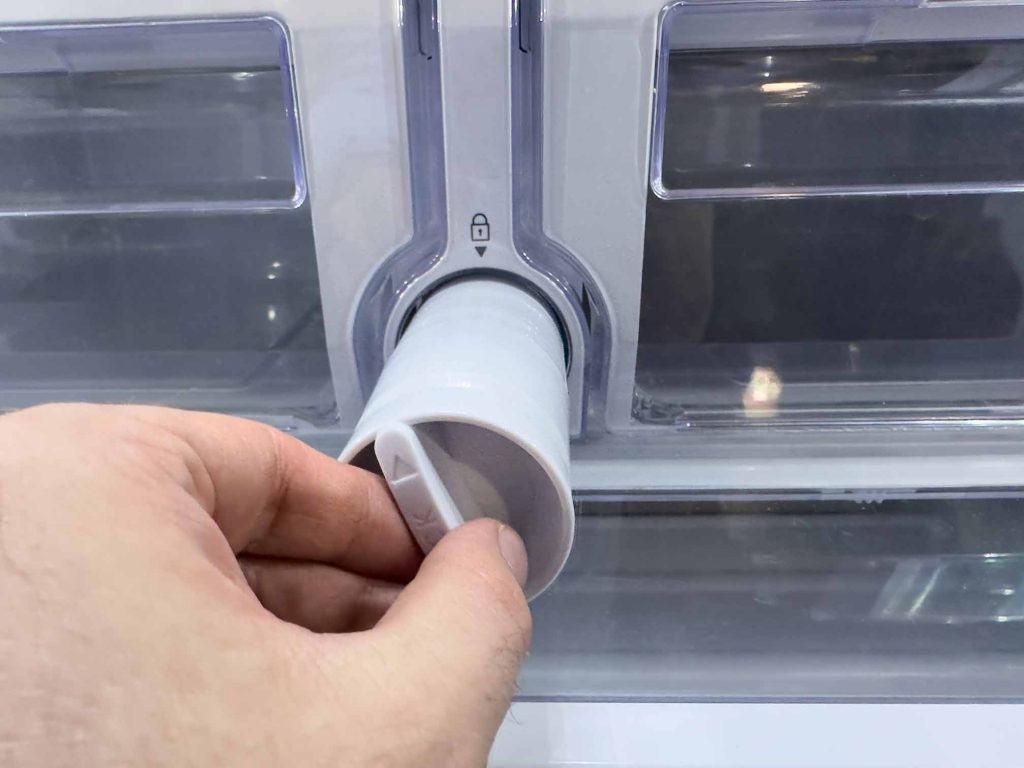
1. Shut off the main water supply and pull the old filter:
The first essential step is to shut off the main water supply to the refrigerator. Once the water is off, find the filter cartridge. Turn this cartridge about 1/4 turn counterclockwise to loosen it. Then, carefully pull the old filter straight out from its case. It’s normal for a small amount of water to leak at this point. Keeping the filter cartridge horizontal as you pull it out can help minimize this leakage.
2. Keep dry:
After removing the old filter, empty any remaining water from the filter tray and ensure the area around the filter case is dry to prevent potential overflow. Now, take your new water filter cartridge. Insert the new filter into the filter case.
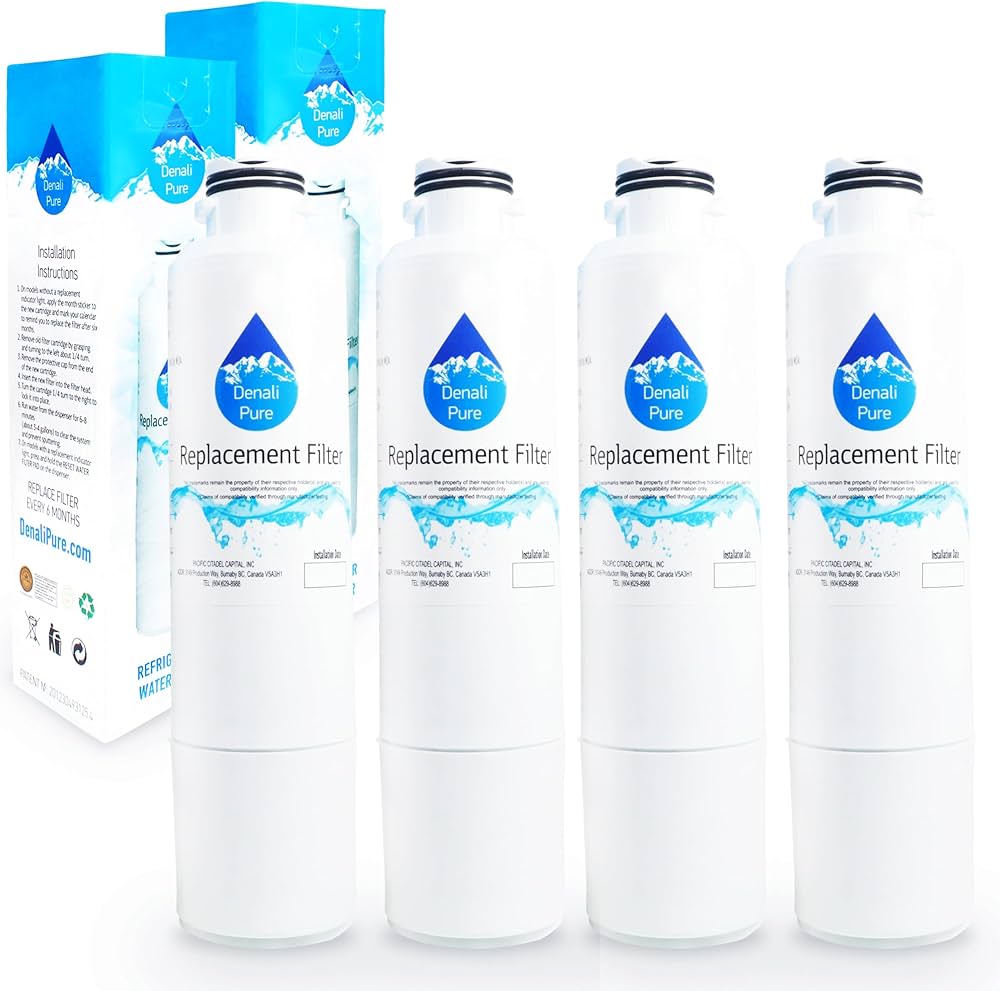
Now we should prepare the new water filter. The part number is DA29-00020B. Some sellers refer to it as HAF-CIN or HAF-CIN/EXP. See samsung rf260beaesr water filter part number. You can buy it from https://amzn.to/42AzMt9.
3. Push the new filter:
Push the new filter in, and then turn it clockwise until you feel it lock firmly into place. The manual notes that the locked symbol on the filter should align with the indicator line on the case when properly installed. If you encounter difficulty inserting the filter due to high water pressure, temporarily shutting off the water supply again might help.
4. Flush the system:
Once the new filter is securely installed, turn the main water supply back on. It is crucial to flush the system after replacing the filter. Dispense approximately 1 gallon of water through the refrigerator’s dispenser (this process usually takes about 6 to 7 minutes).
This step is crucial for cleaning out the water supply system and removing any air that may be trapped in the lines. If the water isn’t running clear after dispensing the first gallon, flushing your household lines further might be necessary.
Please note that some initial dripping from the dispenser may occur after replacement due to residual air in the line.
5. Check water leaks
As a final check, open the refrigerator door and inspect the area around the newly installed water filter to ensure there are no water leaks.
6. Reset the water filter indicator light on the control panel:
This is the very last step. To do this, press and hold the “Fridge” and “Power Cool” buttons simultaneously for approximately 3 seconds. The red indicator light for the water filter should then turn off, signifying that the reset is complete.